Showing posts with label Co-Bolt Blue. Show all posts

Friday, July 5, 2013

Land that I love

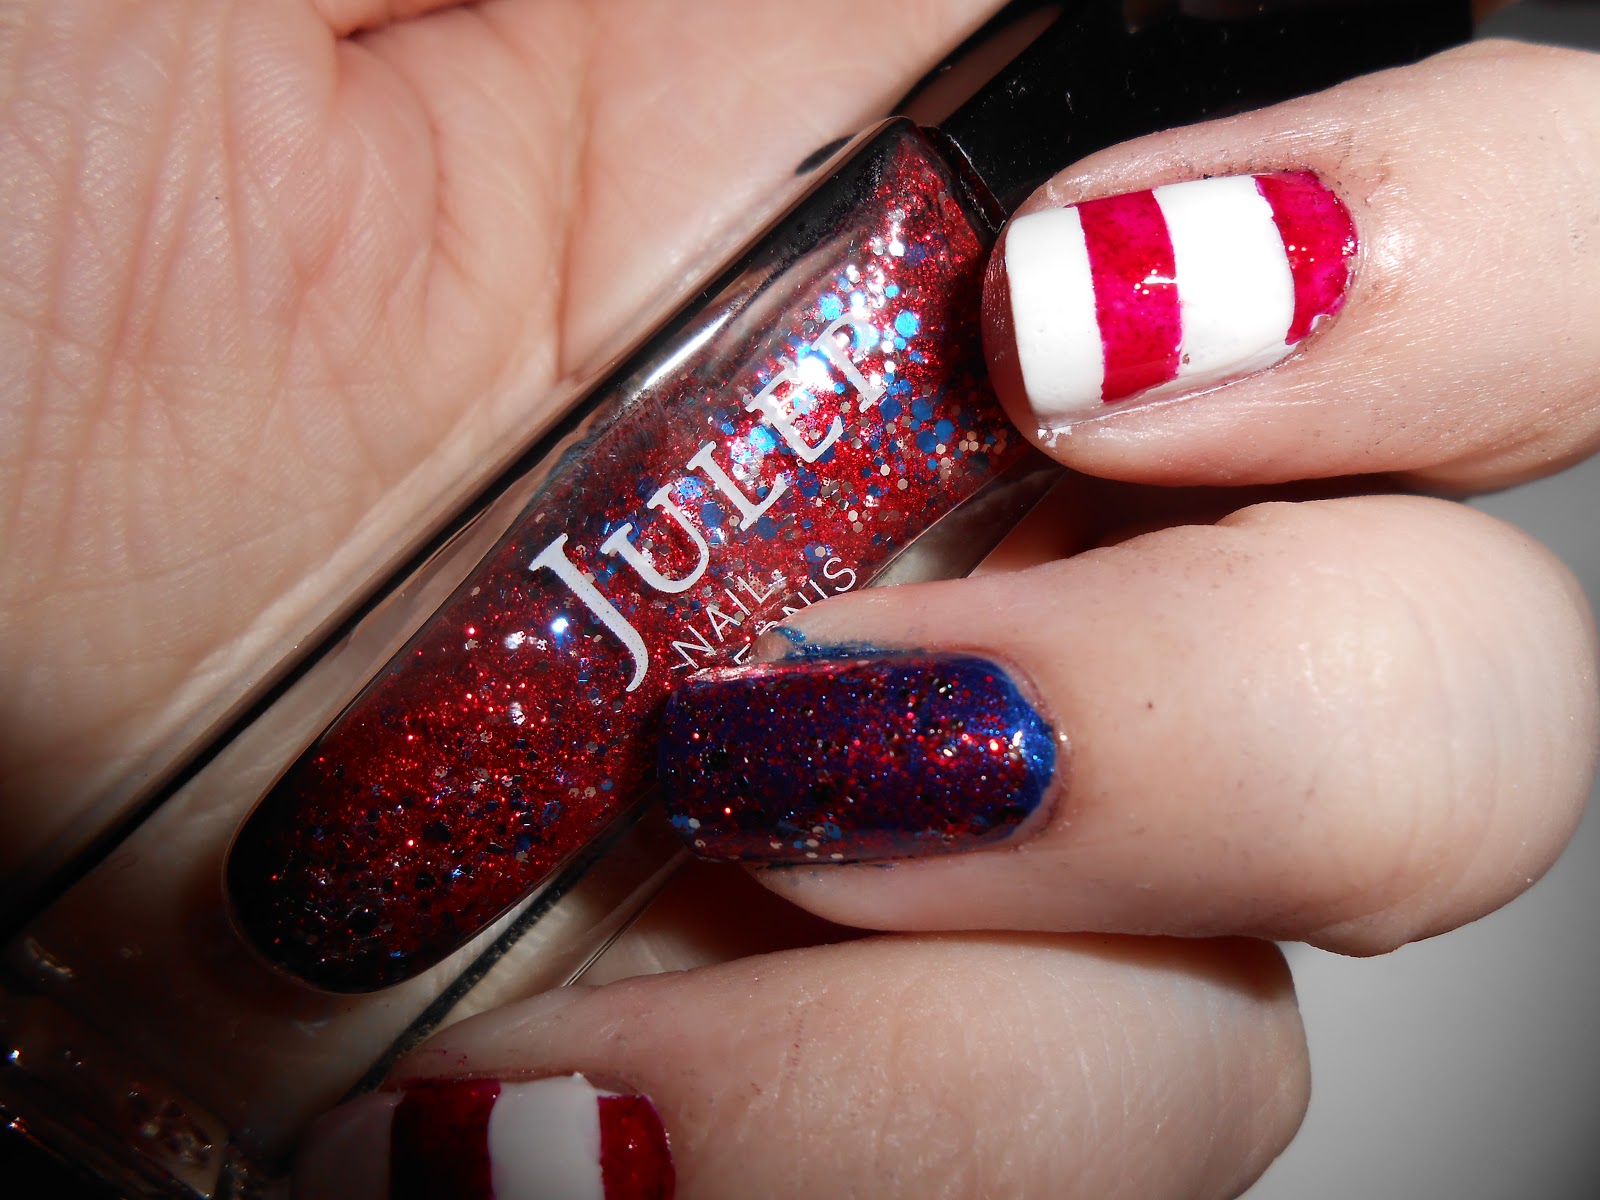
I know it's the 5th, but these were my 4th of July nails.  I tried my hand at this pin that links to Californails, but I couldn't find the mani on the tumblr feed, so I can't link to that.

*1 coat Sally Hansen Hard as Nails Hardner
*2 coats Cover Girl White Night
*Sally Hansen Xtreme Wear Co-bolt Blue
*OPI Danke-shiny Red
*Sinful Colors Queen of Beauty
*2 coats Out the Door


The thing about macro shots is that they amplify every little detail that the perfectionist in me hates!  The reality is that these came out really cool and I'm pretty proud of them (even the right hand!).  Up close all I can think is I have NO idea how ladies get straight freehand lines!  Anyway, when these are a normal distance from my eyes, I really like them.  I got a lot of compliments on them the past two days.  What I found really strange was that at least a third of those comment came from men.  I guess Independence Day brings out some hardcore patriotism that men embrace, even if it is in nail polish!


I applied two thin coats of white for my base knowing the others would cover it well.  I taped off half of the nail and painted on Co-bolt Blue.  I really never get tired of how gorgeous this polish is.  It's much darker without a flash on it, but that shimmer is just as visible.  Then I freehanded on stripes with Danke-shiny and a small brush.  Finally, when I hoped it had all dried, I painted on the glitter stripe which shows up much better in real life.  It helped me worry a little less about areas where polish snuck under my tape lines!


This really got me excited to get back into trying more nail art.  I can polish and add glitter or an accent like nobody's business, but it's been months since I really tried to do anything beyond that.  Shaky lines aside, I really did like this design and now that I have some more free time, I'm feeling the itch to keep trying new stuff and branch out more.  Have you had a cool design that inspired you to get more adventurous with your nails?

Tuesday, January 15, 2013

New 31DC: Watercolor

So, first an explanation for my missing challenge yesterday, then today's challenge. Yesterday's theme was stamping, which I am terrible at. Like, to an embarrassing degree. I haven't put a ton of time into it yet, but I was not in the mood to fail. I try to be open and do not edit my photos at all (if I get handy with some editing tools, I'll let you know when they are cleaned up pictures). I try to be real about my shortcomings. Sometimes, though, I need to be a little gentle with myself. I'm not super stoked on my life situation right now, and polish (and this blog) are a little refuge for me. I may not be perfect, but I am becoming more and more happy with my polish skills and the way that my nails look. They are one of the very few things I feel I am moderately good at and they make me happy. When they don't, when they feel like a chore or a bummer, I need to stop. This is something to lift me up and give me some joy, not bring me down or frustrate me. That is not to say that I don't want to try new things that I may not be great at, but I don't want to set out to bring myself down with something as trivial, and yet therapeutic, as painting my nails and writing about it. Yesterday was the breaking point--I had done enough sketchy challenge days and was just tired of feeling like a failure, so I didn't do that to myself. I little part of me felt bad, and I may try some stamped nails later this month, but for now I'm okay with the fact that I was kind to me yesterday and I hope that you are too!

So, onto my first watercolor attempt. If you've never tried watercolor nails before, the idea is to use acetone to dilute the pigment. You start with a base and a couple of coats of top coat, then dab on color and use a brush dipped in acetone to dab over the color to wash it out and blend it together. I was having a hard time coming up with inspiration, so I went with different shades of blue.
 

*1 coat Sally Hansen Hard As Nails Hardener
*2 coats Sinful Colors Snow Me White
*2 coats Out The Door
*Sally Hansen Insta-Dri Co-Bolt Blue
*Sinful Colors Why Not
*Color Club Take Me To Your Chateau
*1 coat Sinful Colors Pearl Harbor
*1 coats Out The Door


I started with a clean white base.  Then, with very little direction for application, I went with my darkest color first--Co-Bolt Blue.  I love this navy, shimmery blue (which you already know if you've seen any other post I made with blue in it) and it's wonderfully opaque.  I dabbed it on and then, with a small paint brush dipped in acetone, dabbed some more!


Next I used Why not, with the same technique and (lack of) precision.  This cream is a medium blue, much lighter than I realized when it was diluted with acetone.  I'll also draw your attention to my index finger and the missing polish near the tip.  The point of using 2 layers of top coat before the water color effect is to protect your base from the acetone.  However, if, like me, you decide to add more polish or are overenthusiastic with your dabbing, you might just see your nail make an appearance...  Lesson learned.


I added a coat of Pearl Harbor, an iridescent blue glitter, to draw it all together.  This last picture was under a lamp, without flash, and I added it because the color is much truer here.  Overall, I'm not super-thrilled with this look.  I think part of the problem is the monochromatic choice, which I'll remember.  I think this look is interesting and I may very well try it again with better color choices.  Have you done a watercolor mani before?  What did you find worked well?  Do you have any good tips?


Monday, October 29, 2012

31DC: Inspired by a flag

Eeek!  I'm a little late posting today's challenge.  For the record, this was finished and photographed by 11:56 pm.  Just in case you cared...
Today is inspired by a flag.  This is pretty random and doesn't really seem to fit with the other challenges, but so it goes.  I considered trying a pirate theme, but then I decided to try to redeem my abysmal Fourth of July nails.  I have 2 untrieds today (sorry, I've been forgetting to track them!)


*1 coat Sally Hansen Hard As Nails Hardener
*2 coats Julep Kate
*2 coats Sally Hansen Insta-Dri Co-Bolt Blue
*China Glaze Ruby Pumps
*1 coat Julep America
*1 coat Seche Vite


This is much closer to what I had actually planned to paint in July, until my red polish wouldn't open.  I tried a new white for this one--Julep Kate.  While very subtle, this has a soft shimmer to it that helps make the white less harsh and white-out-y.  I think I'll be using it more frequently now that I know how nice it is.  I used 2 coats, which cut down on streaks.  If it wore it alone, with a glitter, I think I might do 3.


Previews of America are really what prompted me to sign up for Julep.  It was so pretty in the swatches I saw that I signed up and got it in my first non-intro box.  I had not used it yet, and was a little disappointed.  The micro red glitter, blue and silver hexes show up well and and were easy to apply.  I did not see any stars, though, as I fished through :( 
 

It's funny how things show up so differently in photos and in real life.  In these pictures I like America a lot more--it lets Co-Bolt Blue show more.  In real life, it is actually pretty opaque for a layering glitter.  Ruby Pumps looks really thin in these photos, with Kate showing through, but is dark and glittery in person. 
I'm curious to know your thoughts on Julep.  I am getting this month's box, and it's the first I have chosen since the summer.  I have not been over-the-moon stoked with the polishes so far.  Do you subscribe?  Are there colors you love that I need to add on?  I can definitely say that their customer service is amazing, but I'm on the fence about the polish right now.
If you've never tried Julep and want to see what their polish and products are about, you are welcome to use my referral link (http://www.julep.com/rewardsref/index/refer/id/47422/) and use "COLOR2012" at checkout to get your intro box for $0.01 (that's right, just a penny!).

Sunday, October 21, 2012

3DC: Inspired by a Color

3 weeks in!  I really did not think that I would make it this far into the challenge because it's pretty demanding, so I'm pretty proud of myself.  Today kicks off the final third: inspirations.
Inspired by a color is a little bit unfair because I have already posted color inspiration manis here, here, and here for Go Pink Wednesdays, and I'll have a couple more coming.  But, a challenge is a challenge, so I went ahead and tried another one.
I bought MaxFactor's Fantasy Fire on a blog sale a while back.  I know that this is super sought after and have been hesitant to use it because it's so small!  I decided to kind of let this be my color inspiration today.


The red/purple combo with the dark blue base is really pretty.  I have quite a bit of nail art coming up this week, so I really just wanted to do something simple and easy, and there's not much that's easier than layering glitter!  You can see the sparkle of Fantasy Fire in this next photo:


*1 coat Sally Hansen Hard As Nails
*2 coats Sally Hansen Insta-Dri Co-bolt Blue
*1 coat MaxFactor Fantasy Fire (ring finger)
*1 coat Finger Paints (thumb and middle)
*1 coat Nubar 2010 (index and pinkie)


I used 1 coat of Fantasy Fire over the navy Co-bolt Blue.  It's hard to really see in these photos, but in real life the pretty purple-red shimmer is very strong.  I hate that this is so expensive and hard to come by because I'd love to use more layers of it, but that bottle is so tiny!

 
I wanted to play with the red-blue color combo, so I used red-shifting flakies over the top of the navy.  I decided to use both Nubar 2010 and Finger Paints Flashy to compare them.  They both have red flakes of glitter that lay flat and are really easy to apply.
 
 
The flakes in Flashy are consistently a bit bigger than 2010, but the two are really close to each other.  I didn't think they'd be so similar when I used them because the bases appear so different, but it's really pretty hard to tell them apart on the nail.


Do you own any of these pretties?  How do you pair your flakies?  Any cool combos I should try?  What about Fantasy Fire?  Do you have it?  How do you use this tough to find jewel?

Wednesday, October 10, 2012

31DC: Gradient

Now is when the challenge begins to get scary for me! I am not very skilled in true nail "art" and mostly just paint my nails. I have seen a lot of amazing gradients and tutorials for using sponges to make it easier, but I was still so nervous to try (and post) one myself. Then I found this great gradient and little tutorial and thought maybe I could handle it!


I don't have the same navy blue that she does, but I went with my trusty Insta-Dri Co-bolt Blue. I love this navy! It is a really saturated, rich blue that is almost a one-coat polish. It has a subtle shimmer to it in the sun and the wide brush that I love.


*1 coat Yello-Out base
*2 coats Sally Hansen Insta-Dri Co-Bolt Blue
*Kleancolor Holo Blue
*Kleancolor Holo Pink
*1 coat Seche Vite

This was my first experience with these Kleancolors and these holo glitters are SO pretty! I used the Holo Blue first, like she suggested. I let it pool just a little around my cuticle and brushed upward. Instead of doing a coat over the whole nail, I stopped each stroke when the glitter stopped, leaving the tips of my nails alone.


Then, with a decent amount of polish on the brush, I blobbed it on the tips of my nails and pushed/pulled it back toward the cuticles. Because I didn't do a practice run, I then went back and added a bit more pink to the tips to make the gradient a little more defined.


These colors are so pretty together! I was surprised with how this turned out. While yes, I am ashamed that I didn't clean my nails and fingers up better, this actually turned out better than I expected! I like the look of it and am excited to try again. Practice makes perfect, right?
 

The pictures really do not do these glitters justice.  You can see some of the holo reflecting in my blurred index finger in this last one.  Have you tried these yet?  Do you have any other great tips for perfecting a gradient nail?  I'd love to hear your tips!